
The box joint is a simple and effective method of joining pieces of lumber. There are three main ways to cut box joints: by hand, with a table saw and jig, or with a table router and jig.
What is a Box Joint?
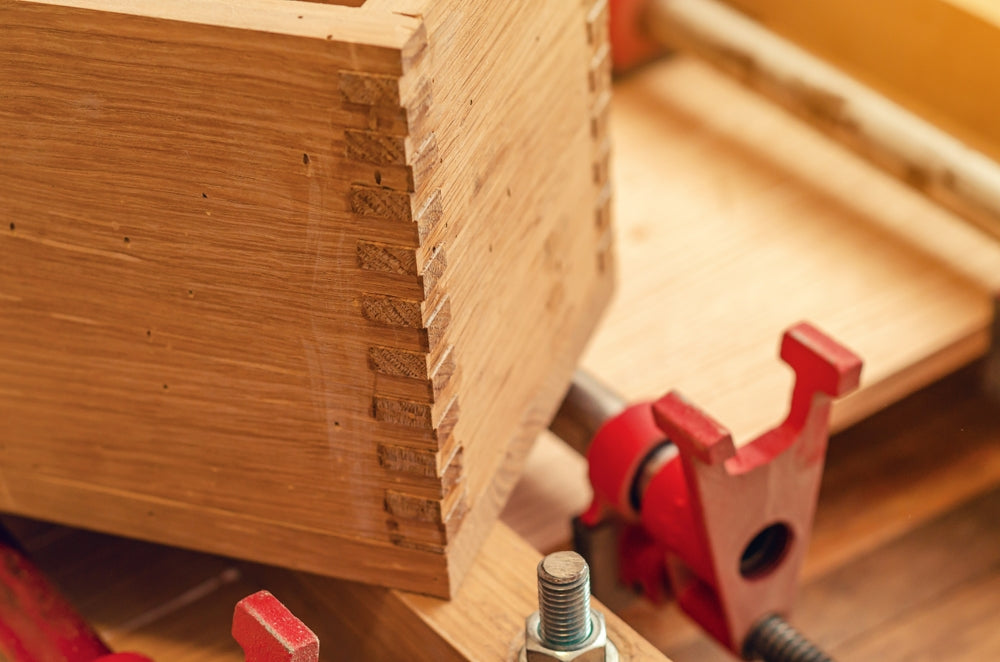
A box joint is a woodworking joint used to join two pieces of wood at right angles.
A box joint consists of a series of interlocking rectangular fingers or tabs, typically cut into the ends of the two pieces of wood that are to be joined. These fingers are usually cut at right angles to the faces of the wood pieces, with one piece having the fingers cut in the same direction as its thickness and the other piece having the fingers cut in the opposite direction.
When the two pieces of wood are pressed together, the fingers interlock, creating a strong and durable joint that is resistant to twisting and pulling forces.
Like the dovetail joint, box joints rely on a large contact area for glue. Unlike the dovetail, this method relies less on complicated geometry – which is not to say that you won’t need to measure as carefully!
Box Joint vs Finger Joint
What’s the difference between a box joint and a finger joint? Some woodworkers use the terms interchangeably. But in my book, a box joint joins two pieces of wood set at a right angle. Box joints make a corner. The “fingers” of a box joint are not tapered.
A finger joint, on the other hand, connects two pieces of wood to make the piece longer. The interlacing fingers are tapered, often to a point.
What Are They Used For?
The box joint is a strong woodworking joint, perfect for drawers, and as the name suggests, boxes of all types. They are used for frames, benches, or anything you need to attach at a right angle. They can be both functional and decorative.
How Do You Cut Box Joints?
There are several ways a box joint can be cut. They can be cut by hand, or you can make up a box joint jig for use with a table saw or a router.
Each method takes a little time, but if you are cutting a large number of box joints, then it is a good idea to invest in a dado stack for your table saw and spend time making up a jig. Your router table will use a similar jig to cut fingers.
Cutting bigger box joints, say three-quarter inch, makes for a simpler job. Fitting wide fingers together is easier than narrow finger joints, and they look great too.
How to Cut Box Joints by Hand
When I started in the joinery shop, after I had proved I had learned to sweep up the wood shavings without complaining, I was taught how to cut box joints by hand.
Cutting box joints by hand is technically simple, but is also exacting and can take time to get right.
What Tools Will You Need?
A Sharp Pencil
Use a regular HB pencil, sharpened to a point. Precision is everything!
A Marking Gauge
Use a marking gauge to set the depth of the cut. It should be a little over the thickness of the pieces that you are going to join.
Once fitted the finger joints should stand slightly proud, ready to be brought back down with your block plane.
A Small Square
An essential tool in every woodworker's kit! A small square will fit neatly over the edge of the boards. Make sure that the edge is square, and that it has been cut square too.
Any deviation will cause problems later when the finger joint is either too short or too long.
A Dovetail Saw
A dovetail saw is smaller and finer than a tenon saw, and if you are working on a budget, readily available for under $20 at most big box DIY stores. The fine teeth will prevent box joints from splitting and give a woodworker more control over the direction and depth of the cut.
A Coping Saw
You will need a coping saw for the horizontal cut. This is the part that takes practice, and where you hone your box joint skills.
A Sharp Chisel
Use a fine, sharp chisel to take out any imperfections, say if your cut left a little too much material in place.
One of my favorite woodworking tips is that even a brand-new chisel, straight out of the packaging, will always require a little sharpening before you let loose with it on a workpiece! Five minutes on a sharpening stone will polish up an edge and clean off any imperfections.
A Block Plane
If all goes well there will be a little bit of planing to do to bring the end grain of the finger joints properly flush with the face of the boards. Once the glue dries and you have cleaned it off, run the plane from the corner edge to prevent the end grain from splitting out.
Method 1 - Hand-Cutting Box Joints
- Setting out is key to getting hand-cut box joints right. Put the two edges joined together face to face and mark across the two edges so that the cuts will line up exactly.
- Markup which is the face, and which is the top edge. It’s easy to get confused and cut out the wrong bit. Put them together to check how the cut-outs and fingers will alternate before you begin.
- Then mark them out clearly!
- Don’t cut them together in the vice because the finger and cut-outs will not match up.
Top Tips
Use your pencil to shade out all the notches between the fingers that need to be cut out, or mark with an X, to make sure you cut out the right box joint pieces every time.
- Be gentle with the marking gauge. It is easy to go too deep and leave marks that will take time to sand out later.
- Cut as close to the lines as possible. Remember, it’s easier to remove timber when a joint is too tight than it is to add any material back on.
- Practice on a scrap piece of lumber first to gain confidence before you make a start on your main project. Perhaps make up a test joint to understand how the joint works.
- When using the coping saw, adjust the blade to 45° and start the horizontal cut just above the line. Gently rotate the saw until you get it to the horizontal position, then readjust it to 90° to complete the cut.
- Any excess on your box joint can be shaved off with your chisel afterward. Use a wooden mallet for control.
- Hand-fit the two pieces to make sure they come together easily.
- Use a mallet if it is a tight fit, just remember that if it is too tight the timber could split out.
- Once you have cut, cleaned, and dry-fit all the pieces together, glue, square up, brace, and leave to dry.
Method 2 - Using a Table Saw and Jig
If you are planning on making several boxes, or a robust drawer set, then investing in a dado stack for a table saw will save heaps of time when you need to cut box joints.
If you have already made the investment required in running a good tabletop saw, then you know that these accessories don’t come cheap. In my experience, it’s not worth trying to cut costs when cutting box joints, so bite the bullet and get the best dado blade set you can.
For finger joints, the first thing to do is make up your box joint jig. Spending time getting box joint jigs right, and experimenting with scrap pieces of wood, will make production smoother.
Top Tip:
I always run a piece of scrap wood through a dado blade setup first as a test joint to make sure I have the spacing right before I commit a workpiece!
Setting Up Your Table
- Once the dado stack has been fixed in place, adjust the height of the saw blade to the same thickness as the workpiece, or just a little over. It's always better to have end grain that is slightly proud on the finger joints.
- Use a piece of wood as long as your workpiece is wide to form the jig.
- Using a miter gauge, place the jig on the face of it and run it across the blades to form a notch.
- Take a piece of timber the same size as the notch and fit it in the cut-out. It will form the guide for the jig and is referred to as a jig pin.
- Next, reposition the timber a joint width along, with the help of an offcut from the timber used to fill the notch.
- Clamp it securely to the miter gauge and you’re ready to go.
- After the first cut, simply move the workpiece over and slot it onto the timber guide to give the correct spacing for the box joints.
Top Tip:
You can use a scrap piece of wood between the workpiece and the jig to help prevent any splitting out that may occur if you are box jointing plyboard, or similar, large-grain material.
Method 3 - Using a Router Table and Jig
The method for making a box joint on a router table is the same as when cutting with a table saw. The jig setup works the same way.
Use a straight bit and ensure it is secure in the collet before you begin.
With both a table saw and a router table, care must always be taken to ensure your fingers are safe from the rotating blades at all times.
How to Cut Box Joints With a Router
You can cut a box joint with a hand-held router. All you need to do is form a secure box joint jig to guide the blade.
Box joint jigs can be made using short lengths of batten glued together or you can purchase a jig to use with a simple vice and table setup in your workshop.
If you don’t have the space for a tabletop saw or router, then this will help overcome that issue.
Top Tip:
Remember to wear proper eye protection when using a hand-held router and making box joints, as you will need to keep a close eye on proceedings.
Looking for Supplies for Your Next Project?
North Castle hardwood is quickly becoming one of the most sought-after sources for premium hardwood lumber in the United States. All of our walnut, cherry, red oak, white oak, and hard maple lumber is sourced and produced in the Great Lakes region. We carefully select and sort our lumber to offer you only boards with superior color, texture, and consistency.
Our lumber is precision-dried to ensure it will perform well even in detailed applications like box joints. Check out our selection of dimensional and thin-cut lumber today!


