
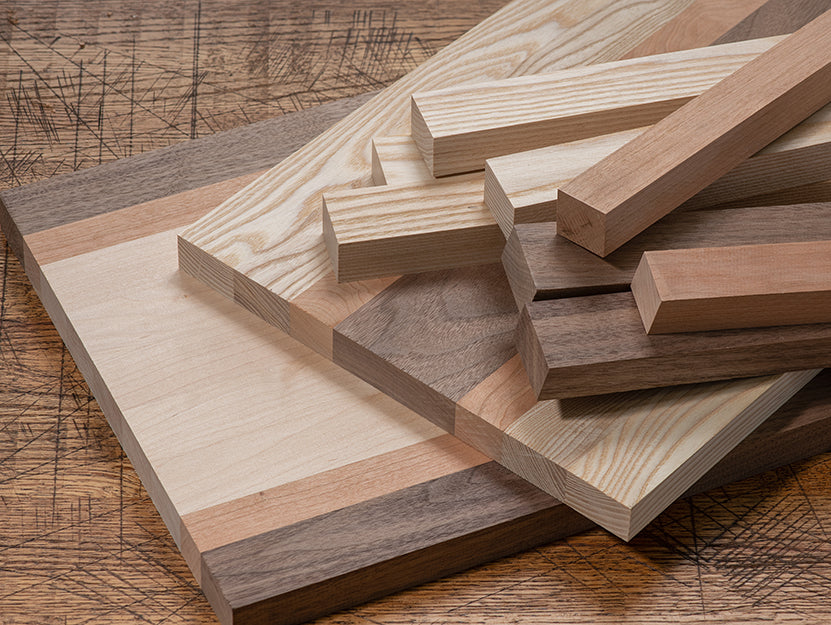
Your Source for Premium Hardwood Products and Lumber


Featured Products
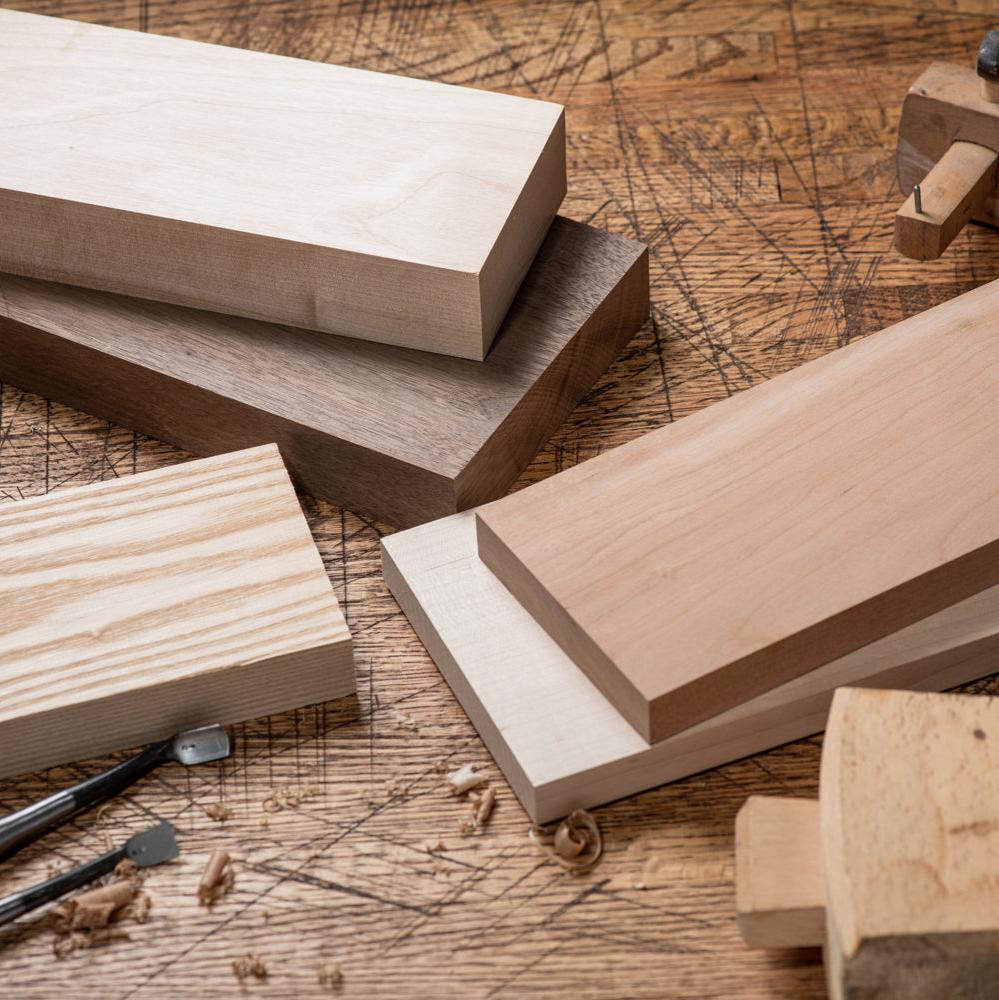
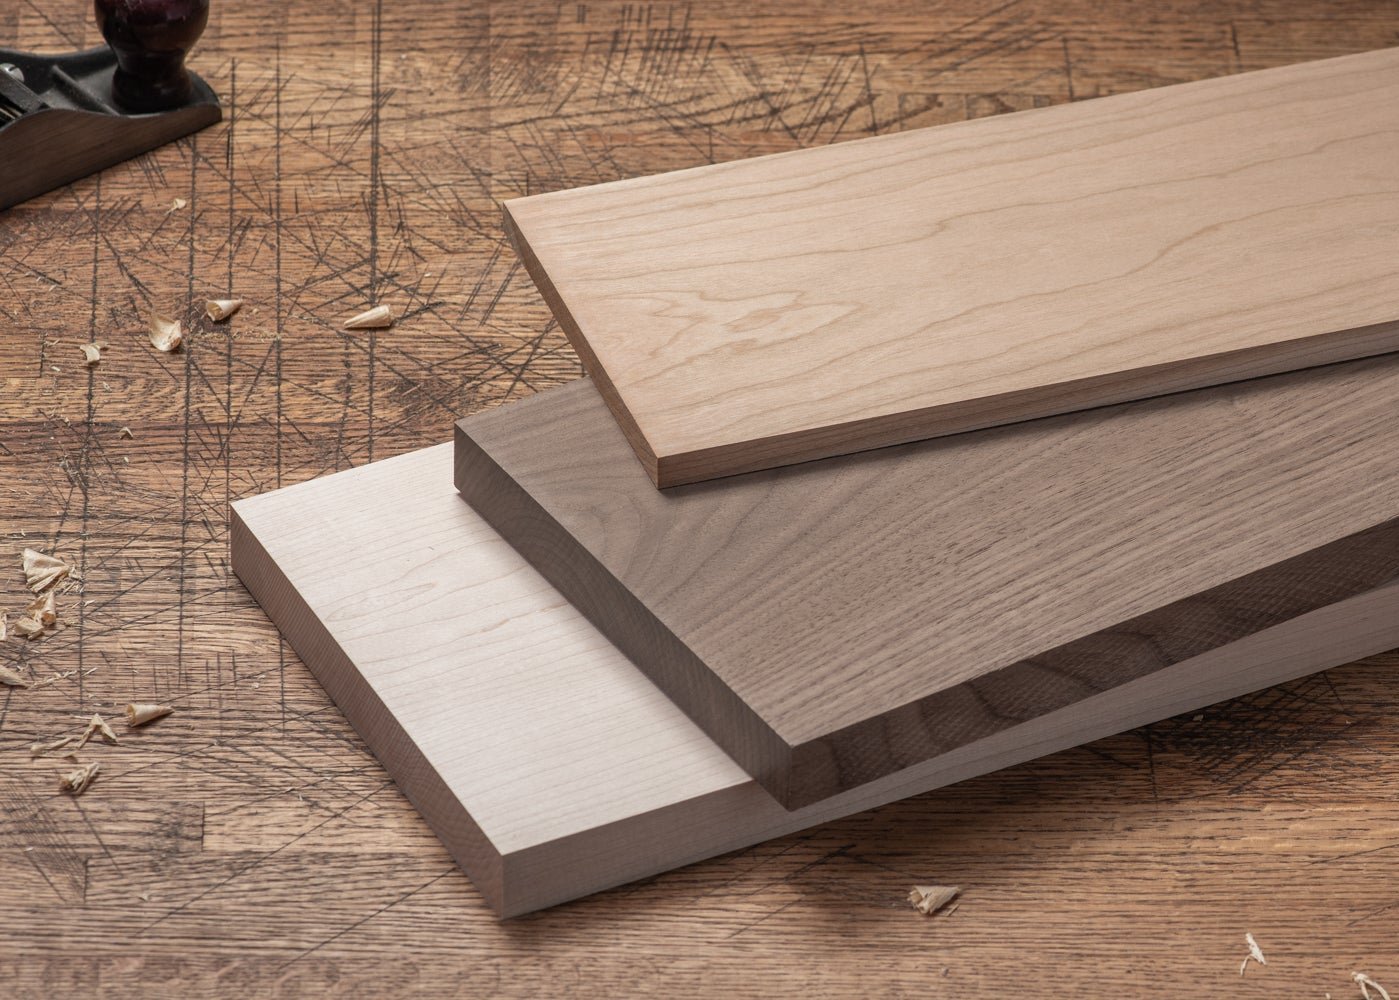
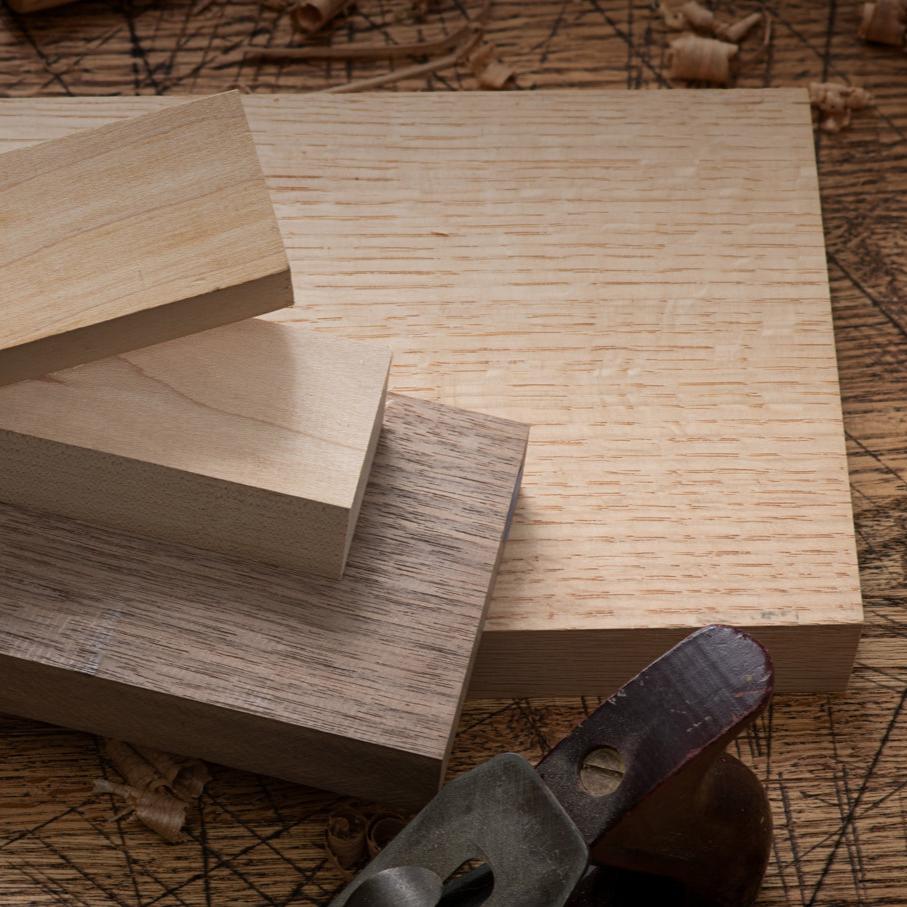
Check out our top product offerings for the home or your next woodworking project.

| Species: | MAPLE (HARD MAPLE) |
| Type: | Dimensional Lumber |
| Width: | 2.5", 3", 3.5", 4", 4.5", 5", 5.5", 6", 6.5" |
| Length: | 18", 24", 30", 36", 42", 48" |


| Tabletop Material: | Walnut, Cherry, White Oak (Rift and Quartered) |
| Leg Material: | Walnut, Cherry, White Oak |


| Color: | Tan, Brown |
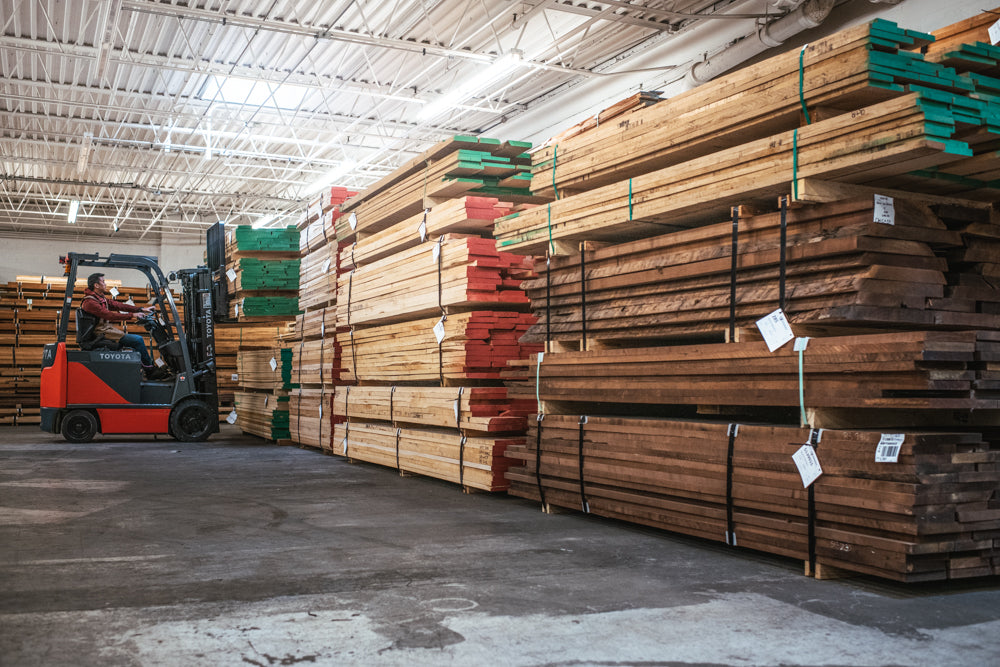
Ethically Sourced
We have a close relationship with our loggers and sawmills and guarantee that our materials come from environmentally mindful harvesting.


MORE ABOUT NORTH CASTLE
Transform your home with custom furniture, shelves, and countertops from our Chicagoland manufacturing. Or use premium hardwood for your own home or contracting projects!
Discover Woodworking
Learn tips & techniques for working with hardwood lumber.

Strong & Stylish: Best Woods for Floating Shelves
Floating shelves are one of the cleanest ways to add both function and beauty to a space. Their minimalist design puts the focus on materials, making the wood you choose a major part of the finished look. But looks aren't everything. The best wood for shelves combines visual appeal with the strength to support weight over time without warping or sagging. In this guide, we’ll help you choose the right species for floating shelves that last and look great while doing it. Why Wood Choice Matters for Floating Shelves Floating shelves rely on internal brackets or wall-mounted hardware that supports the shelf from within. Because there are no visible supports, the shelf itself takes on all the weight and load stress. That makes wood selection more than just a style decision. A dense, stable hardwood will hold up under daily use. A well-matched grain pattern and color will make your shelves stand out for the right reasons. Choose carefully, and you’ll have shelves that are both strong and timeless. Key Traits to Look for in Shelf Wood When choosing the best wood for shelves, consider the following traits: Strength and stiffness: The wood should resist bending over time, especially with books or dishware. Also, as the strength of the hardware depends much on the strength of the wood it’s fastened to, most hardwoods excel in thread strength and stability. Dimensional stability: Movement due to changes in humidity should be minimal. Workability: Clean machining and reliable joinery help ensure safe, solid installation. Appearance: Color and grain should complement your space and finish well. Hardwoods tend to outperform softwoods in all these categories. And with the right finish, they offer a look and feel no engineered product can match. Best Hardwood Species for Floating Shelves At North Castle Hardwoods, we focus on premium North American hardwoods that balance strength and appearance. Floating shelves are structural components, not just decorative pieces. With no visible supports, the hardwood must carry the load while remaining stable and visually consistent. We offer two floating shelf constructions designed for performance and clean presentation. Cirrus Floating Shelf The Cirrus Floating Shelf is crafted from a single piece of solid hardwood. This one-board construction creates uninterrupted grain from end to end, giving it a clean, natural look. When mounted directly into wall studs, the Cirrus offers exceptional strength. Its concealed bracket system is completely hidden, creating a true floating effect that highlights the natural beauty of the wood. Stratus Floating Shelf The Stratus Floating Shelf shares the same concealed bracket design but is constructed from multiple solid hardwood pieces laminated together for width. Using multiple pieces instead of having to select from one wide piece allows the Stratus to be a more affordable option. Boards are carefully selected for color harmony and grain consistency, resulting in a cohesive finished appearance. Both styles are currently offered in Walnut, Cherry, and Maple, with additional species available by special order. Maple Hard maple is dense, smooth-grained, and exceptionally stable. Its light, creamy color suits modern and Scandinavian interiors, and it finishes to a clean, consistent surface. Strength: High density and stiffness Workability: Machines cleanly with sharp tools Look: Subtle, even grain ideal for clean-lined shelves Maple’s closed grain resists dust and grime buildup, making it a practical choice in kitchens and living spaces. Walnut White oak brings strength, water resistance, and timeless appeal. With a coarse, prominent grain and tones ranging from light brown to olive-gray, it suits both traditional and modern spaces. Strength: Excellent for long spans and heavy loads Workability: Sharp tooling helps manage its density Look: Distinctive grain with potential for ray fleck in quartersawn boards Its natural durability makes it a great option near sinks or in high-traffic areas. Red Oak Genuine Quercus rubra (Northern red oak) is a strong and cost-effective option for floating shelves. It is slightly lighter in weight than white oak, making installation more manageable while still delivering impressive structural performance. Strength: Very strong with reliable stiffness Workability: Machines and sands well Look: Open grain pattern that accepts stain and color exceptionally well Red oak can appear brighter than white oak depending on the finish, and it responds beautifully to a wide range of stain tones. For projects where budget efficiency and finishing flexibility matter, Northern red oak is an excellent choice. Responsibly sourced from North American forests and carefully selected for consistency, it remains one of the most versatile hardwood options for shelving applications. Cherry Cherry offers fine grain, moderate density, and a rich patina that deepens with age. Its warm reddish hues evolve over time, giving shelves a sense of history and craft. Strength: Moderate, with good stiffness Workability: Very easy to shape and sand Look: Refined and elegant, ideal for traditional or transitional interiors Cherry finishes beautifully and offers excellent color depth, especially when paired with oil-based finishes. Shelf Design Considerations Beyond wood species, a few design details influence how your shelves perform and look: Thickness: Thicker shelves (1.5" to 2") offer a bolder look and more support Depth: Keep in mind the balance between usable surface and weight distribution Length: The longer the span, the more critical wood strength and bracket quality become Mounting system: Use a concealed bracket system rated for the expected load Always anchor into wall studs and test your support system before placing items on the shelf. Finishing Tips for a Lasting, Stylish Look The right finish can enhance the wood’s natural character and provide protection from daily wear. Here are some tips: Sand thoroughly to a fine grit before applying any finish Choose a clear coat like polyurethane for maximum protection, or use hardwax oil for a more natural feel Avoid stain on highly figured woods like walnut, which look best in their natural tone Apply multiple coats, allowing full drying time between each layer A good finish prevents moisture damage and makes dusting and cleaning easier, especially in open shelf setups. Try some finishes we offer: Pure Tung Oil Offers exceptional protection with multiple coats Does add yellowish color to wood Wood Wax With 3 colors available, choose one that best suits your interior and highlights the wood character how you like Good protection for medium-traffic surfaces Why Use North Castle Hardwoods for Shelf Projects From forest to finish, we take pride in offering lumber that’s ready for precision work. Our boards are responsibly sourced from North American forests and hand-selected for clarity, color consistency, and minimal waste. When you order from North Castle Hardwoods, you get: Straight, stable boards with excellent grain Proprietary grading that ensures high-yield material Surfaced and kiln-dried stock ideal for furniture and shelving We supply both hobbyists and professionals, and we’re always ready to talk through your project needs. If you need help choosing the best wood for shelves that match your vision and stand the test of time, we’re here. Key Takeaways Floating shelves need strong, stable woods with good grain and finish potential Maple, walnut, white oak, and cherry each offer unique benefits for shelf projects Design and installation play key roles in performance A proper finish protects your work and brings out the beauty of the wood For clean, consistent hardwood that inspires great work, start your next shelf project with North Castle Hardwoods. Reach out anytime to talk shop, request samples, or place an order.

White Oak Lumber: Color, Grain, & Characteristics
White oak is one of North America’s most respected hardwoods, a go-to species for fine furniture, cabinetry, flooring, and architectural millwork. Its unique combination of beauty, strength, and durability makes it a favorite among craftsmen who demand both performance and aesthetic appeal. In this guide, we’ll take a closer look at white oak characteristics, from its natural color and grain to its workability and resistance properties, and why North Castle Hardwoods is a trusted source for premium white oak lumber. What is White Oak? White oak (Quercus alba) is a true native of eastern and central North America. It is a member of the beech family and part of the closed-pore oak group, which includes other dense, durable hardwoods. The tree itself can grow large and tall, often reaching diameters that yield wide, clear boards. As lumber, white oak is prized for its structural stability, exceptional wear resistance, and understated beauty. White Oak falls into an interesting category for closed grain vs open grain. It is technically open grain, but inside its pores it has tyloses which are like capsule structures inside the pores. These, in effect, close up the grain internally, but the surface remains open grain. In contrast to Red Oak, which also has open pores, but does not have tyloses - red oak allows water and moisture to flow through its pores and moisture is then absorbed (and released) internally and not just on the surface. The tyloses are what give white oak its water resistant properties as the moisture is closed off from entering the wood through the pores. White oak is also a little more environmentally stable (before finishing) as the tyloses also close off the core of the wood from excess moisture absorption and release. Also, if you look at the end grain of a white oak, the pores are clearly visible which is characteristic of open grain. At North Castle Hardwoods, we only source genuine Quercus alba, never mixing in similar-looking but inferior species. From forest to finish, we keep control of the process to ensure the boards you receive are consistent, clean, and ready for your best work. Color & Appearance Freshly milled white oak lumber ranges from pale tan to light brown, often with subtle olive or gray undertones. Over time, it deepens into a warm, golden tone that adds character without overpowering a space. The sapwood is light and tends to blend well with the heartwood, especially in carefully selected material. One of the defining white oak characteristics is its natural color consistency. At North Castle Hardwoods, each board is hand-selected for color and workability, making it easier to build panels, doors, and wide surfaces that feel cohesive from end to end. White oak also responds well to a range of finishes. It can be kept light and natural or pushed warmer with oil-based products, all while maintaining clarity in the grain. Grain Pattern & Texture White oak displays a straight, coarse grain with medium to large rays, which create beautiful ray fleck patterns when quartersawn. These rays are more prominent than in red oak, giving quartersawn white oak its signature figure, a favorite in Arts & Crafts and Mission-style furniture. In plainsawn boards, you will see cathedral patterns that are bold but refined. The texture is firm and even, providing a crisp, clean surface for hand tools or machining. There are also a few structural considerations worth understanding when working with white oak. Plainsawn white oak will often develop surface checking during the drying process. Checking begins almost immediately after the log is sawn and appears as small separations along the grain. This is a natural part of how the wood releases moisture. In typical amounts, especially in thicker boards of 1/2 inch or more, these checks do not affect the overall strength of the wood. White oak remains one of the strongest North American hardwoods. During kiln drying and reconditioning, these surface checks will often close at the face but can remain just beneath the surface. As you begin milling, they may reappear. This is important to account for when planning yield and final thickness. For thinner stock under 1/2 inch, we generally do not recommend white oak for structural or loadbearing applications due to this characteristic. Rift and quartersawn white oak offer a different set of advantages. Because of the way logs are quartered to achieve vertical grain, boards are typically narrower than plainsawn material. What you gain is consistency. The straight, uniform grain pattern makes these cuts ideal for glue-ups, where boards blend together with minimal visual interruption. With well-matched material, especially when it is hand-selected for color consistency and workability, glue lines become difficult to detect. The result is a clean, continuous surface that elevates the final piece, both visually and structurally. Key Working Properties White oak is dense, strong, and built for performance. It machines cleanly with sharp tooling and holds detail well, making it a reliable choice for joinery, edge profiles, and tight-fitting components. Its density does require a bit of planning. Pre-drilling is recommended for fasteners, and sharp cutters are essential to avoid burnishing the surface. With the right setup, it rewards careful work with crisp edges and smooth finishes. Adhesion is excellent, and white oak responds well to both glue and finish systems when properly prepared. Its closed cellular structure also contributes to its well-known resistance to moisture, which plays a role in both durability and finishing behavior. At North Castle Hardwoods, our white oak is kiln-dried to controlled standards to reduce internal stress and movement. That consistency becomes especially important as you begin milling, where understanding how the wood behaves beneath the surface can directly impact yield and final results. Durability & Resistance One of the standout white oak characteristics is its natural durability. The wood contains tyloses, structures that block vessels in the heartwood, which make it resistant to water and decay. This makes white oak an excellent choice for exterior applications when properly sealed, including doors, trim, and boatwork. It also holds up well under foot traffic, which is why it is a top choice for hardwood flooring in both residential and commercial spaces. Its wear resistance, combined with its timeless look, gives it lasting value. Common Uses for White Oak White oak's versatility is one of the reasons it remains a staple in both traditional and modern woodworking. Common applications include: Fine furniture Cabinetry and casework Flooring and stair parts Interior trim and mouldings Architectural millwork Barrel staves for wine and spirits Exterior doors and millwork (with proper treatment) Its elegant, neutral appearance also makes it a popular species for Scandinavian- and Japanese-inspired designs where simplicity and wood grain take center stage. Why Source Your White Oak from North Castle Hardwoods? At North Castle Hardwoods, we go far beyond commodity lumber. Every board of white oak we sell is responsibly sourced from North American forests and hand-selected for color consistency and workability. Our proprietary grading ensures high-yield, craftsman-ready boards with very few defects. That means less waste, better matching, and more time spent building instead of sorting. You can count on a level of quality and care that reflects our roots in the hardwood export business. We offer both plainsawn and quartersawn white oak, with clear, consistent surfacing that reveals the wood's full potential. Tips for Working with White Oak To get the best results from your white oak lumber, keep these shop tips in mind: Sharp tools are a must: Dull blades can burn or tear dense hardwoods like white oak.Pre-drill for screws to avoid splitting, especially near ends or edges.Use slow-set glue for better absorption and clamp-up on dense end grain.Consider quartersawn stock for dimensionally stable panels or projects requiring ray fleck figure.Finish promptly after milling to avoid surface discoloration from tannins and exposure. With care and the right approach, white oak rewards the craftsman with excellent results across a wide range of applications. You might be building heirloom furniture or specifying high-end architectural millwork. White oak delivers a timeless combination of strength, beauty, and workability. And when that wood comes from North Castle Hardwoods, you can trust it is the kind of material that inspires great work.

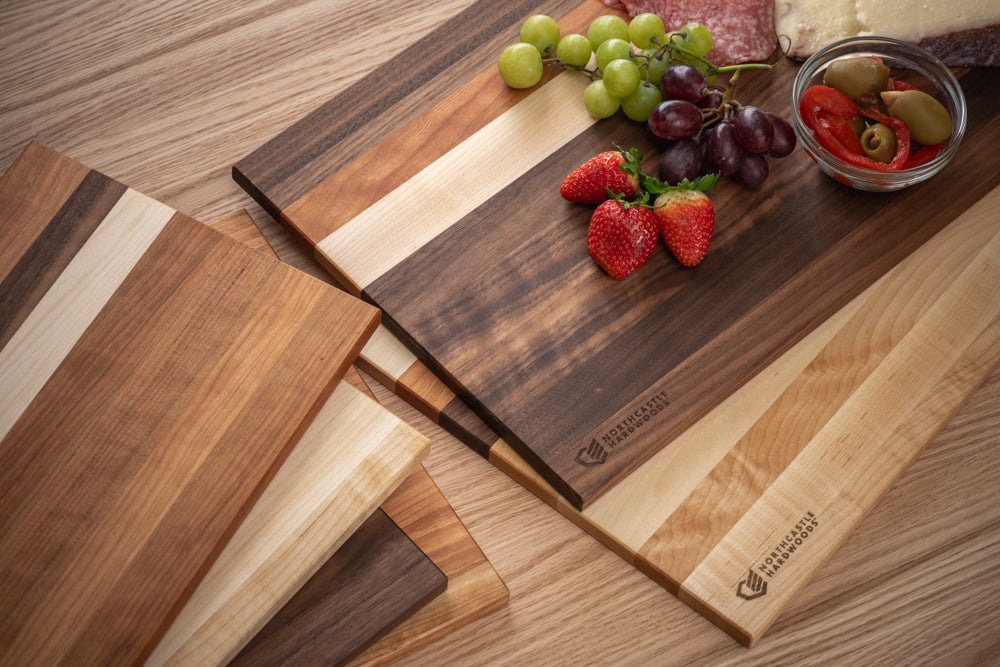
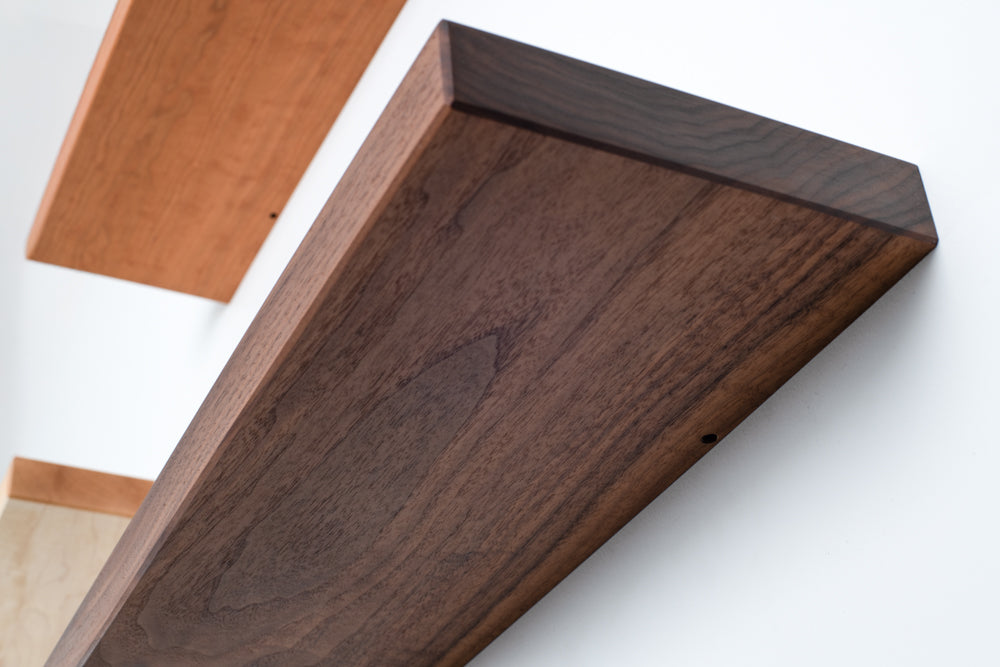
Food-Safe Finishes for Cutting Boards and Countertops
In kitchens, butcher shops, and home workshops alike, wood brings a warmth and function that few materials can match. But when it comes to food contact surfaces like cutting boards, countertops, and serving platters, the finish you choose matters just as much as the species of wood. The right food-safe wood finish not only protects the surface, it safeguards the people using it. This guide walks through everything you need to know to make confident, informed choices in the kitchen or the shop. Why Food-Safe Finishes Matter When wood is used in environments where it touches food, the finish becomes a frontline defense. It protects the wood from moisture, stains, and microbial buildup, and it ensures that harmful substances don’t leach into the food being prepared. Unlike decorative furniture finishes, food-safe options must be non-toxic, non-reactive, and stable once cured. That means no off-gassing, no harmful residues, and no risk to health over time. It’s about preserving both the function and safety of a piece that sees daily use. Look for finishes that have no VOCs (Volatile Organic Compounds). Choosing the Right Wood for Food Contact Surfaces A safe finish begins with a smart wood choice. Hard, closed-grain woods are ideal for cutting boards and countertops. Their tight pores help resist bacteria and moisture, making them naturally hygienic and more durable. Although, some open grain hardwoods, such as Walnut and White Oak, can also be suitable with the proper finish. Some of the top choices include: Hard maple: Closed grain, excellent durability, widely used in commercial kitchens Walnut: Dense and beautiful, with rich color and smooth texture Cherry: Matures to a warm tone, fine grain, easy to work and finish White oak: Contains natural tyloses for water resistance, though open grain makes it better for countertops than cutting surfaces Avoid Red Oak for culinary purposes as its open grains do not have the water-resistant tyloses like its White Oak relative. Red Oak’s open grains act like straws, allowing fluids to completely pass through the board. At North Castle Hardwoods, we supply these species and more, all responsibly sourced from North American forests and selected for clarity, stability, and performance. Types of Food-Safe Finishes (And When to Use Them) At North Castle Hardwoods, our finish recommendations come from years of hands-on experience working with hardwoods in real shop and kitchen environments. We focus on plant-based, food-safe options that perform reliably and bring out the best in the wood. Each of the finishes below has been selected for how it behaves on properly prepared hardwood surfaces, not just how it looks on the label. Cutting Board Oil A plant-based penetrating oil designed specifically for food-contact surfaces. It soaks deep into the fibers and lightly solidifies, helping reduce surface residue while keeping the wood conditioned. *potential for small text beneath the button that states: Available in sizes from 2 oz to 1 gallon Pros: Plant-based, penetrates deeply, solidifies for minimal residue Cons: Requires semi-frequent reapplication with regular use This is a practical, go-to choice for cutting boards and butcher blocks that see daily use and regular washing. Wood Wax A blend of natural waxes and oils that adds a protective layer while enhancing the wood’s natural color and feel. Often used as a topcoat over oil. *potential for small text beneath the button that states: Available in sizes from 2 oz to 16 oz Pros: Plant-based, cures to a hardened layer, long-lasting protection, requires fewer reapplications, easy to maintain Cons: Requires drying and cure time Wood wax is ideal for adding durability and a smooth, finished feel to surfaces that need a bit more protection. Pure Tung Oil One of the most durable natural finishes available, but only when it is truly pure. Many products marketed as “tung oil finish” contain little to no actual tung oil and may include additives that are not suitable for food contact. We always recommend verifying that you are using 100% pure tung oil. *potential for small text beneath the button that states: Available in sizes from 8 oz to 1 gallon Pros: Plant-based, cures to a very hard surface, highly durable, long-lasting Cons: Long cure time, requires multiple coats, adds a slight yellow tone to the wood Pure tung oil is best suited for countertops and serving surfaces where long-term protection is the priority. Hemp Oil A plant-based option for those looking to avoid nut-derived products. It penetrates the wood and cures to provide a moderate level of protection. Pros: Plant-based, no nut products, hardens for protection Cons: Requires cure time, not as hard as tung oil Hemp oil offers a reliable alternative for food-contact projects where allergen concerns are part of the decision. How to Apply Food-Safe Finishes Properly Application techniques matter just as much as product choice. A poorly applied finish may offer little protection and could even compromise hygiene. Basic steps: Sand the surface smooth with fine-grit sandpaper (180 to 220 grit) to open the grain and remove machining marks. Clean thoroughly to remove all dust and oils before applying finish. Apply liberally using a clean cloth or brush, allowing the finish to soak in deeply. Let it sit for 15 to 30 minutes, then wipe off excess. Repeat as needed for additional coats, allowing each to fully absorb and cure. Buff lightly if using a wax or oil-wax blend for a smooth, satin feel. Drying or curing oils like tung oil may take several days (up to a month) to fully cure, depending on atmospheric conditions. Keep surfaces out of use during this period. Long-Term Care and Maintenance Even the best food-safe wood finish needs routine maintenance. Water, knives, heat, and cleaning agents wear down protection over time. Reapply oil monthly for high-use boards, or when surfaces appear dry. Also, if your board seems to be losing its hydrophobic (water repellant) properties. Avoid soaking wooden items or running them through dishwashers. Clean with mild soap and water, then dry immediately, exposing both faces for even drying Use a little Cutting Board Oil every few uses for added moisture resistance. Proper care keeps your wood pieces safe, looking good, and performing well for years. Common Mistakes to Avoid Some common errors can compromise both the finish and the function of food contact wood surfaces: Using non-food-safe finishes like polyurethane or conventional stains Skipping sanding, leading to rough or blotchy finishes Applying too much wax (or not removing excess), which can gum up and attract dirt Using unfiltered vegetable oils (such as Olive Oil), which can spoil and create odors Neglecting reapplication, causing drying and cracking For curing finishes such as Tung Oil and Hemp Oil that start as liquid oil, avoid using the flood method which is to submerse or soak the wood with the finish. Curing oils require oxygen to properly cure and the flood method traps oils underneath the surface (after it hardens) and cannot properly cure. This leads to bubbling and cracking of the surface. Patience is necessary for multiple coats but pays off with a very long-lasting finish. Avoiding these pitfalls ensures both safety and longevity. How North Castle Hardwoods Supports Food-Safe Projects From forest to finish, we help you get it right. Our premium hardwoods are kiln-dried, surfaced, and hand-selected for quality that stands up to food contact use. We specialize in: Genuine hard maple, cherry, and walnut boards with excellent grain for finishing Quartered and rift white oak, ideal for countertop slabs Clear, stable boards that reduce prep time and waste Need wide panels or custom selections? We’ll work with you directly to match your specs and help you choose wood that finishes clean and performs beautifully in kitchens, butcher shops, or restaurants. In the Workshop or the Kitchen: Choose the Right Finish Every Time Food-safe finishes are more than a final touch, they’re a crucial part of a well-made, safe, and long-lasting product. If you're building a cutting board for home or installing countertops for a commercial kitchen, the right wood paired with the right finish makes all the difference. With North Castle Hardwoods, you get wood that inspires great work. Have questions about species, finishes, or custom orders? Reach out anytime. We’re here to help.

Essential Tools for Working with Dense Hardwoods
Dense hardwoods reward skill. They hold crisp joinery, resist wear, and finish beautifully. But they also demand more from your woodworking tools than softer, more forgiving species. When you’re working with Genuine Quercus rubra (Northern red oak), hard maple, hickory, or white oak, every cut, pass, and bore has to be intentional. The right tools don’t just make the job easier. They protect your material, improve yield, and elevate the final result. Just as important, using the right tool for the job is critical for safe handling. A dull blade on a table saw or router creates excess resistance, increasing the risk of losing control and dangerous kickback. When tools are underpowered or not properly sharpened, that added resistance can lead to slips, putting your hands exactly where they shouldn’t be. Let’s walk through the essential tools for working safely, confidently, and cleanly with dense hardwoods. Understanding the Challenges of Dense Hardwoods Dense hardwoods bring strength, stability, and character. They also bring resistance. High Janka ratings mean: Increased blade wear Greater strain on motors Higher likelihood of burning Tear-out if cutters aren’t razor sharp More resistance during drilling and fastening These woods don’t forgive dull edges or underpowered machines. They reveal weaknesses in your setup immediately. That’s why selecting the right woodworking tools is less about convenience and more about control and safety. With the proper equipment, dense hardwood becomes a pleasure to work. It becomes predictable, precise, and deeply satisfying. Must-Have Cutting Tools Cutting is where dense hardwood pushes back the hardest. Clean crosscuts and rip cuts require sharp edges, high-quality steel, and sufficient power behind the blade. High-TPI (Teeth Per Inch) Handsaws and Japanese Pull Saws When precision matters such as trimming tenons, fine joinery, or detailed work, high-TPI handsaws shine. Dense hardwood fibers respond best to: Thin kerf blades Fine teeth, typically 12 to 20 TPI depending on the task Consistent tooth geometry Requires some skill, but can produce exceptional results Japanese pull saws are especially effective. Their pull-stroke design reduces flex and allows for exceptionally clean cuts with less effort. On tight joinery, that control makes all the difference. Premium Carbide-Tipped Circular Saw Blades Dense hardwood will expose a low-quality blade in minutes. Invest in premium carbide-tipped blades designed specifically for hardwood ripping and crosscutting. It’s important to note that there are different blades for ripping vs crosscutting. This is due to the direction in which the fibers of the wood are in relation to the blade. Crosscut saws require more TPI as smaller cuts help to get a cleaner cut across fibers. Rip saws have fewer teeth and deeper gullets between teeth for optimal dust extraction; this ensures the blade does not get coated with dust which would create excess heat and burn. Look for: High tooth count for crosscuts (60 - 100 TPI) Low tooth count (24 - 40 TPI), deep gullets, and flat-top grind for ripping Heavy carbide that can withstand multiple sharpenings This is not where you cut corners. A high-quality blade improves finish quality, reduces burn marks, and increases overall yield. That matters even more when your lumber has been selected to maximize usable surface area. There are combination blades (40-50 TPI), which are acceptable for infrequent use. But if you’re going to be doing a lot of cuts, having dedicated blades will ensure easier and more accurate cuts while also extending the life of your blades. Bandsaws with Sufficient Torque Resawing thick hardwood boards requires torque and blade stability. An underpowered bandsaw will wander and stall. Choose: At least a 1.5 to 3 HP motor A rigid frame to minimize deflection Quality blades matched to the cut, such as 3 to 4 TPI for resawing dense hardwood. A “skip tooth” blade, while a little more pricey, can aid in clean and efficient resawing. Dense species like hard maple and white oak demand steady feed rates and strong motors. When properly set up, a bandsaw becomes one of the most versatile woodworking tools in your shop Planing and Jointing Equipment Surfacing dense hardwood is where tool quality truly separates average results from professional ones. Heavy-Duty Planers with Sharp, Replaceable Blades Dense hardwood dulls knives quickly. A planer designed for hardwood should feature: Solid feed rollers Minimal snipe (freedom of calibration recommended) Easy blade replacement Enough motor power to avoid strain Sharp blades are non-negotiable. Dull knives create tear-out and heat, especially in tight-grained woods like Genuine Quercus rubra (Northern red oak). Helical Head Jointers If you frequently work with dense hardwoods, a helical cutter head is worth serious consideration. Helical heads: Reduce tear-out Run quieter Stay sharp longer Allow for individual insert rotation They excel on figured grain and dense material where traditional straight knives may struggle. The result is cleaner edges and surfaces with less waste. Router and Shaping Essentials Routing dense hardwood requires control and sharp tooling. Variable Speed Routers with Carbide Bits Dense hardwood demands slower speeds and high-quality bits. A variable speed router lets you dial in RPMs appropriate for larger diameter cutters. Always use: Solid carbide or carbide-tipped bits Sharp profiles Light passes instead of heavy material removal This prevents burning and extends bit life. Spiral Cutters for Cleaner Edges Spiral bits, especially compression spirals, produce noticeably cleaner edges in hardwood plywood and solid lumber. They: Reduce tear-out Improve chip evacuation Cut cooler When working with hardwood that has been hand-selected for color consistency and workability, spiral cutters help preserve that clean edge through shaping. Drilling and Fastening Tools Dense hardwood resists fasteners and dulls inexpensive bits quickly. Drill Press with Quality Brad-Point or Forstner Bits Hand drilling dense hardwood can work, but for repeatable accuracy, a drill press is invaluable. Use: Brad-point bits for clean entry holes Forstner bits for flat-bottomed holes Sharp bits only Pre-drilling is essential when fastening dense species to prevent splitting and ensure tight joints. Clamps That Actually Hold Dense hardwood is less forgiving during glue-ups. Its weight and resistance demand clamps with real pressure capacity. Look for: Parallel jaw clamps Pipe clamps for longer spans Even pressure distribution Quality clamps protect joint integrity and prevent shifting under pressure. Sharpening Systems and Maintenance Gear If you take one thing away from this guide, let it be this. Dense hardwood rewards sharpness. Sharpening Stones and Honing Guides Chisels, plane irons, and hand tools must be razor sharp. A complete sharpening system should include: Coarse, medium, and fine stones A reliable honing guide Regular maintenance habits Sharp edges reduce fatigue and dramatically improve cut quality. Dust Collection Systems Built for Fine Hardwood Dust Dense hardwood creates fine, persistent dust, especially during sanding and routing. A proper dust collection system should: Provide strong airflow Include fine filtration Capture dust at the source This protects your health and keeps your equipment running smoothly. Why Material Quality Matters Just as Much as Your Tools Even the best woodworking tools cannot compensate for inconsistent material. That is where we take pride in doing things differently. At North Castle Hardwoods, we focus on: True species identification, including Genuine Quercus rubra (Northern red oak) Lumber responsibly sourced from North American forests Boards hand-selected for color consistency and workability A proprietary grading system that ensures high-yield, craftsman-ready boards Full process oversight. From forest to finish, we keep control of the process Dense hardwood products in our collection include: Northern red oak (Quercus rubra) White oak Hard maple Hickory Walnut Cherry Each species brings unique density characteristics and working properties. Whether you are building cabinetry, furniture, millwork, or architectural components, starting with well-selected, consistent material makes every tool in your shop perform better. Great tools and great wood go hand in hand. One amplifies the other. Key Takeaways Working with dense hardwoods demands more. It also delivers more. To succeed: Invest in sharp, high-quality woodworking tools Use carbide-tipped blades and bits Ensure machines have sufficient torque and stability Maintain a disciplined sharpening routine Use clamps and drilling tools built for hardwood resistance Prioritize dust collection for safety and cleanliness Start with properly graded, responsibly sourced lumber Dense hardwood is not difficult. It is demanding. And that is part of its appeal. With the right tools and the right material, you are not just cutting boards. You are shaping wood that inspires great work.

The Art of Steam-Bending Wood
Learn how to steam bend wood using traditional techniques. Discover tools, tips, and the best lumber for elegant, functional woodworking projects.

Woodworking Safety 101: Tips to Prevent Common Injuries
Stay sharp, stay safe: Prevent injuries in your woodworking shop with smart habits, clean tools, and a tidy, focused workspace.
Surfaced Lumber Guide: What does S2S, S3S and S4S Mean?
Like many crafts, woodworking comes with its own dialect. Some of the language of lumber can be tricky to get used to. But many terms that seem technical – such as S2S or S4S – are actually simple to understand and use as you plan your next woodworking project. What does S2S, S3S, and S4S lumber mean? Designations S2S, S3S, and S4S tell you the level of milling that has taken place on a board. In these terms, the first S means “surfaced” and the second “S” means sides. The number tells you how many sides have been surfaced. What does “surfaced” mean, when referring to lumber? It means that the board has been milled or planed to create a smooth surface, free of saw marks or rough edges. What Does S2S Lumber Mean? “S2S” lumber means “surfaced two sides.” S2S boards have two finished surfaces, usually the widths (faces) of the board opposite each other, with the edges left rough. They are ideal for projects that may have a requirement for variable-width boards. S2S lumber can be used to exploit a rustic look to the edges, or you could use a bandsaw to follow an uneven, natural shape along the length of the grain. When a project only has one or two finished sides to be visible, and you’re okay with some variance in width and length, S2S lumber is the type to choose. To use S2S lumber in fine woodworking projects, you’ll need to do some of your own milling or planing in your home or shop. Where to Use S2S Lumber S2S is great for construction or structural work. If you like to do a little bit of your own milling, then S2S is a great time-saver over using rough cut lumber. You get to see the figure and grain straight off without the back-breaking work required to take it from rough to finished. What Does S3S Lumber Mean? It follows then that S3S lumber has been finished on three sides, with one edge ripped nice and straight. One edge may still be rough cut, but in many woodworking projects, some surfaces are never seen, so S3S becomes a practical and economic choice. S3S boards give a woodworker the choice of flexibility when it comes to custom widths or shapes. Why pay more for a finished edge that will end up in the off-cuts bin? At North Castle Hardwoods, we offer S3S lumber packs in two grades: clear one face (C1F) and clear two face (C2F) to help you maximize efficiency on your project. Where to Use S3S Lumber Shelves and bookcases, which have one face against a wall, are ideal projects for S3S lumber. With one rough edge, adjustments for depth are easy: for example, scribing a shelf to an uneven stone, or a brick-finish wall. What does S4S Lumber Mean? S4S lumber has been finished on both faces and both edges, which should mean that the boards have four perfectly square corners. The length and width of the board can vary, of course. S4S lumber is different from a lumber square, where the width and thickness of the board are the same measurement. S4S is a popular choice among hardwood woodworkers. The lumber is ready for use in a wide range of standard projects and is of a consistent shape and size. Where to Use S4S Lumber Dimensional S4S lumber is ready to use with a minimal amount of preparation or work. Use it on furniture and cabinetry projects, or for cutting boards and any fine woodworking project. If your time is limited, or you don’t have the necessary milling hardware of a planer or jointer, then S4S lumber is the way to go. Why Can’t You Buy S1S Lumber? Surfacing just the one side of a board sounds like the economic thing to do if you only want a finish on say the top of a cabinet, or on the face of wall paneling. However, lumber is a natural material that reacts to changes in humidity. By finishing just the one side, the rate of drying becomes unequal, and the board will likely cup and bow. Is Big-Box Store S4S Lumber Worth It? Most of the lumber on the racks at your local DIY store will be S4S milled wood. It’s easier to handle, cleaner to move and set out for customers than rough cut lumber or S2S. The problem is that the transport and storage of much of this low-grade lumber sometimes leaves a lot to be desired. Oftentimes it has been exposed to humidity, and it has not been stacked properly. This is why it will show up cupped, warped, and twisted. Finding a nice, straight piece of wood with minimal defects can be a challenge, especially if you’re shopping for hardwood species. The North Castle Difference At North Castle Hardwoods, we have generations of experience in selecting, seasoning, and milling American lumber. All of the S4S lumber on our racks has been meticulously sorted for quality and stored with utmost care. Call or visit us today to pick out premium S2S, S3S, or S4S hardwood lumber you can rely on.
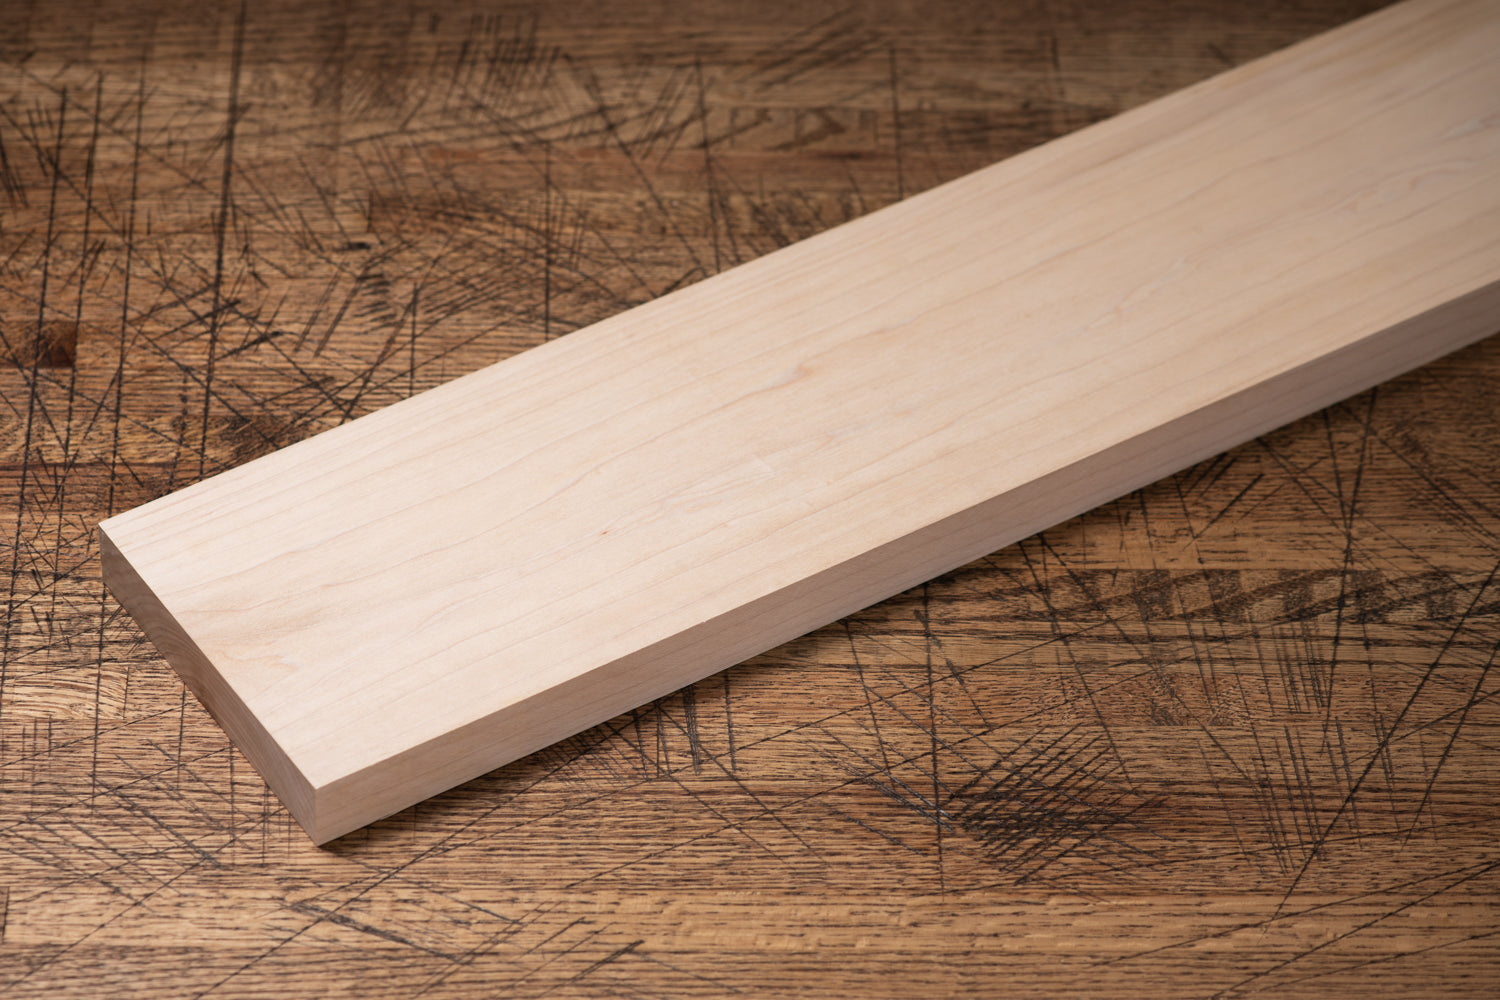
Lumber Sizing Explained: Rough Cut to Finished Dimensions
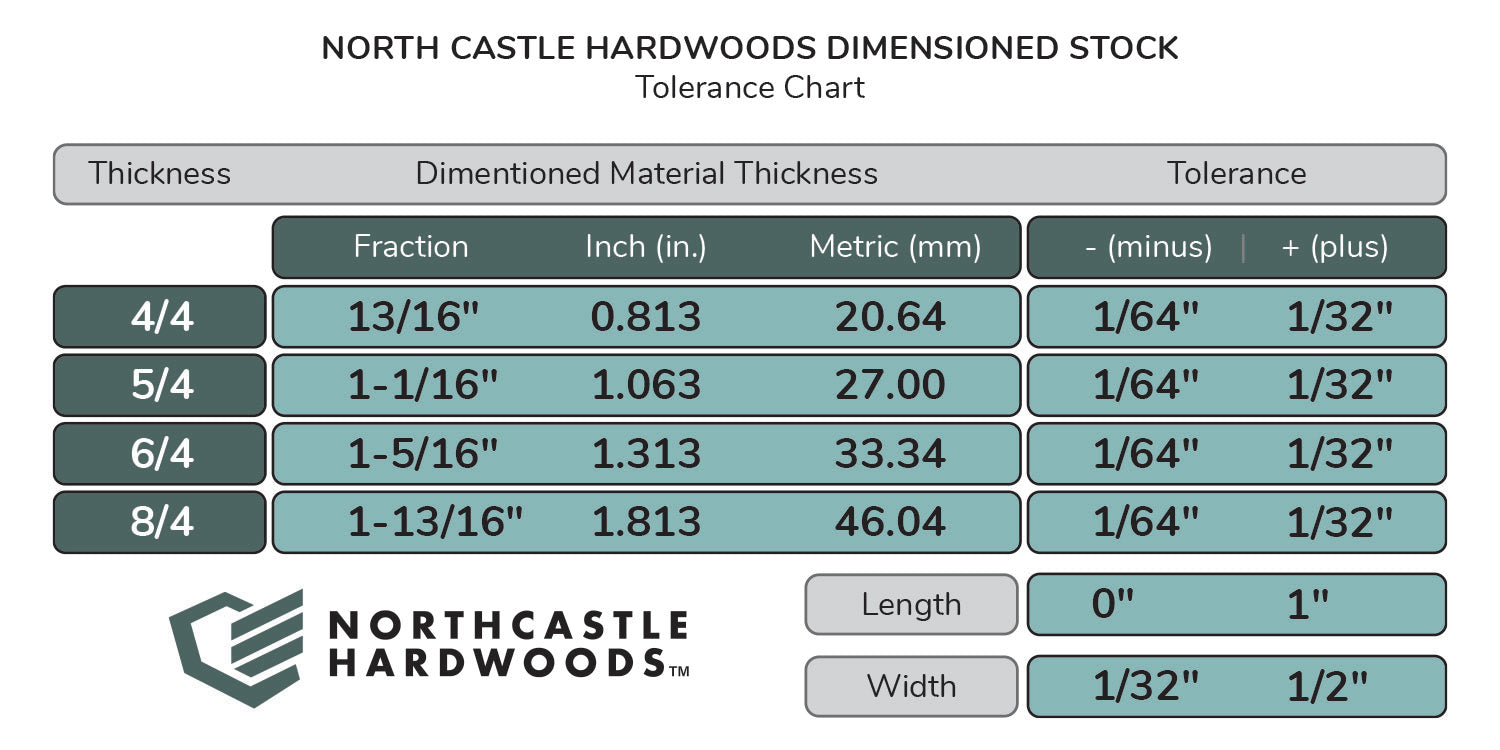
There’s some industry terminology to wrap your mind around when understanding lumber sizing. If you place an order of rough cut lumber, the actual board measurements may differ from your expectations – but there are logical reasons for this. So what does lumber sizing mean, and how do rough cuts compare to finished dimensions? Nominal vs. Actual Dimensions Lumber is often referred to by its nominal dimensions – that is, the dimensions to which it was cut before drying, planing, or finishing. So when we refer to a piece of lumber as a “two by four” (2x4) - that means it was cut to be 2” thick by 4” wide – not that it’s that size when you buy it from the store. Builder grade 2x4’s actually measure 1.5” x 3.5” when you buy them at a lumber yard. Premium grade lumber, such as the kind we offer at North Castle Hardwoods, is sometimes sold the same way. Our 8/4 thick stock, for instance, measured 8/4 thick – that is, two inches – when it was cut. But after drying and finishing, it measures about 1 and 13/16 inches (1.813”) thick. So, in this example, the “nominal” dimension is 8/4, but the “actual” or “finished” thickness is 1.813”. At North Castle Hardwoods, we have very tight tolerances on our dimensioned lumber products. This means that, if you buy a piece of lumber that we say will be finished to 13/16”, the actual thickness of that lumber will be within a 1/32” margin of 13/16”. What do the terms 8/4, 6/4, 5/4, or 4/4 lumber mean? The terms 8/4, 6/4, 5/4, and 4/4 refer to rough cut lumber thickness. Lumber thickness is measured in quarters of an inch. So 4/4 lumber is cut to be 4/4 of an inch thick – or 1 inch thick. 6/4 is rough cut to 1.5 inches thick. 8/4 and 6/4 are often considered “thick stock” lumber. Anything with a thickness of ½” or below is considered “thin stock.” See the chart below. Designation Rough Cut Thickness Finished Thickness (Approx) 8/4 2 inches 1.813 inches 6/4 1.5 inches 1.313 inches 5/4 1.25 inches 1.063 inches 4/4 1 inch 0.813 inches These terms have nothing to do with the length or width of lumber. 4/4 boards can be cut to any length or width. It’s important to keep in mind that the length and width dimensions listed on lumber for sale may be nominal or actual. Rough Cut vs. Finished or Dimensioned Lumber So when you’re buying lumber or calculating how many board feet you will need for a woodworking project, it’s crucial that you know whether the boards you are buying are being sold with nominal (i.e. rough cut) or finished dimensions. Check whether the lumber you’re buying is sold as S2S, S3S, or S4S. S2S and S3S lumber has been surfaced to an exact dimension on two or three sides. The other sides, those that aren’t surfaced, are left rough and can vary in their exact dimensions, often up to ½” or more. The length of the board can also vary up to an inch or two. Check the seller's website for exact details, since different mills have different tolerances. Here at North Castle Hardwoods, we call our S4S lumber “dimensioned” hardwood, because it has been planed or surfaced on all four sides, so you know nearly exactly the thickness and width of the board you are getting. All four surfaces of the board are straight and ready for use in a project without further planing. Buying S4S lumber doesn’t mean you won’t have to cut the board at all for your project, since widths and lengths have tolerances of ½” to 1”. But you definitely won’t get less wood than you ordered, because you can calculate based on actual (finished) dimensions, rather than rough dimensions. Why are finished dimensions of a board smaller than nominal dimensions? If you calculate how much lumber you need for a project based on rough cut dimensions, you may come up short. When wood is dried, it loses a huge percentage of its moisture. Depending on the species, green lumber may have more weight in water than in wood mass. Air-dried lumber should be 15-20% water, and expertly kiln-dried lumber has a moisture content of only 6-8%. While the weight of a board changes with drying more than length, width, or thickness does, these dimensions are also affected. Even after drying, lumber is a natural product, and is prone to atmospheric changes, such as humidity, which affect the size and shape of a piece of wood. After drying, wood may be planed to create a smooth flat surface, remove imperfections, and/or to standardize sizing. This brings the size of the board down a bit more. So What is Rough Cut Lumber? Rough cut lumber is timber that has been sawn but not finished. It’s the wood you will find at the sawmill or lumber yard before it goes off to be further processed. It will likely have saw marks and other imperfections from being cut to size. Rough cut lumber is less expensive than dimensional lumber because of the lack of processing, milling, and treatment. Its main use is in framing buildings where a fine finish is not required. When the lumber is enclosed within a wall it doesn’t matter what it looks like. Some woodworkers like the rustic look that rough cut lumber can give. Others enjoy carrying out the milling work themselves to get the right dimensions for their own project. Partly-finished lumber that retains some textural elements left over from the band saw can suit some woodwork projects. We love S3S lumber, because it’s been surface planed on both faces with a straight-line rip on one edge. The other edge is left rough. This gives the woodworker maximum width and thickness to work with, but makes it easier to get straight edges than it is with rough lumber. Rough cut lumber is often sold by the board foot, as sizes can be irregular. At North Castle Hardwoods, we have tolerances in place to make sure you know what size board you’re ordering. But if you’re shopping at a local mill, always take a tape measure with you so you can be sure you are getting what you came for! The downside to using rough cut lumber for finished work is that it does take a fair bit of work to get to a point where it is usable. You might use it to put together a shop workbench or a rustic outdoor bench and table set. But for fine indoor furniture, rough cut lumber isn’t the best choice unless you have milling and planing equipment of your own. What is Finished Dimensional Lumber? Finished dimensional lumber is what you find on the racks at your local lumber yard or big box DIY store. It’s timber that has been through all the processes required to turn it into a ready-to-use finished product. It will be planed and squared and cut to specific shapes, from rectangular, to square, to tongue and groove planks. The worst defects have been cut off and left behind. Split, waney-edged, and damaged lumber rarely makes it onto the racks if you buy from a reputable supplier. As a result, dimensional lumber will cost more than rough cut lumber – but you’re getting a better value. Which Lumber is Right for Your Project? Rough cut is cheaper, but it will cost you more time to prepare it for use in woodwork projects. Pine is easier to mill at home, as it is a softwood. Hardwoods such as oak, cherry, or maple are much harder and require much more specialist tools. Hardwood can be quite unforgiving, especially if your tools aren’t as sharp as they could be. So if you’re shopping for hardwood, especially, you’ll benefit from buying finished or partially finished boards. The moisture content will be consistent, and the size and performance will meet your expectations. At Northcastle Hardwoods, the quality of the dimensional lumber is never in question. Pay us a visit, or order online today.