
White ash wood has a bright, neutral color. It may not be as interesting as walnut or cherry by itself, but its straight grain and unassuming natural color make it a great candidate for a variety of finishes. It takes stains and dyes wonderfully, making it a master of disguise among hardwoods.
You can use any oil-based, water-based, or gel stain on ash wood. Or you can put a clear poly coat on and use it as an accent to other hardwoods in furniture and woodworking craft projects. The only thing you may want to avoid is a simple oil finish for ash wood. This is because ash, like its fellow heartwood lumber maple, will oxidize and yellow without a layer that protects it from air and UV rays.
In this post, we’ll look at both how to preserve the white color of ash wood and how to take your ash woodworking projects to the next level with creative finishes. Because this lumber is so versatile, the best stain for ash wood depends on your project goals – whether you want a natural look or a bold finish – and how much time you have to spend on the project.
Understanding the Distinctive Characteristics of Ash Wood
White ash (Fraxinus americana) is a tough, resilient hardwood. It has a Janka hardness of 1320. Since it’s lightweight for its strength, it’s popular for restaurant chairs, tool handles, baseball bats, and other items that need to be handled frequently and hold up to wear and tear.
Does ash wood take stain easily?
Yes, ash wood is easy to stain. It has open pores that soak up pigment readily. The grain is generally straight, but wavy patterns in the grain are common. These waves provide an opportunity to create really interesting textured finishes on ash by layering wood fillers and stains.
Finishing ash wood with oil or water-based stain is straightforward. Properly prepared and maintained, an ash wood stain can continue to look terrific for decades. As with most wood, preparation is key to a great finish.
Preparing Your Ash Wood for the Perfect Finish
Ash timber has a relatively high moisture content when first cut. But workshop-ready ash wood – especially our premium dimensional ash lumber – is perfectly dried to a 6-8% moisture content that makes it ready for your projects.
The first step in preparing kiln-dried ash wood to accept a finish is sanding it to the right level. We recommend 220 grit sandpaper as a minimum grade to sand ash wood. Any coarser and the stain may highlight any residual sanding marks. But if you go much over 320 grit, you may end up with a surface that is less receptive to stains and dyes.
When sanding moldings or curved panels, use a foam sanding block to get an even finish across the entire piece.
Does Ash Wood Need a Pre-Stain Wood Conditioner?
Most of the time ash wood won’t require any more preparation after sanding. But if it is very dry and the pores are very “thirsty,” you may want to use a little pre-stain wood conditioner to partially close the pores and achieve a more even finish.
Use a Minwax pre-stain wood conditioner or similar, and let it dry thoroughly before re-sanding any raised grain. Generally, the darker, contrasting grain, with coarser, more open pores will lift following the application of lumber treatment products.
Selecting the Ideal Finish for Your Ash Wood Project
Consider your goals for your ash woodworking project. What sheen do you want? High-gloss, semi-gloss, or matte? Do you want to keep the warm, natural yellow-white color of fresh ash wood, or let it settle into amber tones with age? Or do you want to take advantage of the blank canvas ash offers and experiment with staining techniques?
Is the finish mainly for aesthetics, or do you need it to offer protection from abrasion or weather as well? Just remember that ash is not resistant to insects or moisture, so shouldn’t be used in outdoor applications no matter how you finish it.
Natural Oil or Beeswax Wax Finishes
Oil-and-wax finishes are made of mineral oil, tung oil, or linseed oil mixed with beeswax or carnauba wax. They penetrate deep into the wood, making the most of its natural beauty and protecting it from moisture. These finishes are easy to buff and reapply. But since ash yellows with time, we don’t recommend these except for ash cutting boards or kitchen applications that need a food-safe finish.
Oil-Based Stain Pros and Cons
Oil-based wood stain products can be smelly, so you will need to have plenty of good ventilation when using them. However, they’ve come a long way in recent years and many companies are releasing lower VOC oil stains.
High VOC or not, oil-based stains are the tried-and-true gold standard for even, reliable applications. The longer you leave the stain on the wood surface, the darker it gets. Brush or wipe it on, following the direction of the wood grain. Wipe it off after five to fifteen minutes, depending upon the depth of color required.
Most oil-based stains will dry in a couple of hours during average humidity and temperature conditions. We like to make the most of a dry day and take our projects out to the driveway when working with oil-based stains.
The Minwax penetrating wood finish goes deep into the grain. It says on the can that it takes two to three hours to dry completely, but I've known it to take a lot longer on chilly or rainy days.
Rust-Oleum Ultimate Stain has a great color range and boasts rapid drying and color-fast finishes.
Both brands say their wood stain products are good to go in just one coat, but I've always found two coats about right.
Water-Based Stain Pros and Cons
Water-based stains are the best choice for ash wood if you need it to dry quickly, but this also means you have to be quick when applying it, too! If you’re trying to maintain that wet edge over a whole ash tabletop, for example, you may get an uneven application. On smaller pieces, this is less of an issue.
Another thing to know is that these products usually require a lot of stirring before they are ready to be applied. Mix them up well, and be prepared to use three coats to stain ash wood to the depth of color you want.
Also, they tend to dry a different shade from the straight-out-of-the-can color. So if it doesn’t look right when the stain goes on, don’t panic! Wait for it to dry, and watch as the ash stain settles down.
Gel Stains for Ash
A gel stain is an oil-based product. It takes time to get a good finish with it, but if you can wait 24 hours between coats and then another 72 before top-coating with a clear sealant, the results will be worth the wait.
It mixes up thick and is best laid on heavily and left for ten minutes before you wipe it gently off. Don’t use too much pressure, or you could end up forcing the oil-based gel stain into the open pores of the ash and getting a less even finish.
Gel stains don’t store well, so buy the smallest can that you are likely to need.
You can cover both oil-based stains and gel stains with a water-based polyurethane final sealant.
Shellac and Polyurethane Sealants for Ash
At North Castle Hardwoods, we’re proud of our pure white ash lumber’s clean, bright color. If you want to keep ash wood’s natural brightness, use a clear sealant made of UV-protectant polyurethane.
Clear shellac is a natural resin-based finish that dries quickly and is very durable but is tricky to apply. It gives ash a warm, amber glow that can be buffed to a high gloss. Shellac is also reversible, so it can be easily repaired if it is damaged.
Some people like to use a gel filler to add contrast to ash’s wood grain, then cover that with clear lacquer or poly, followed by a different color stain.
Can You Use Deck Stain?
Staining ash wood with a proprietary deck product such as Ready Seal Exterior Stain, is entirely possible, but the colors are a little strong and may overwhelm the wood's natural grain.
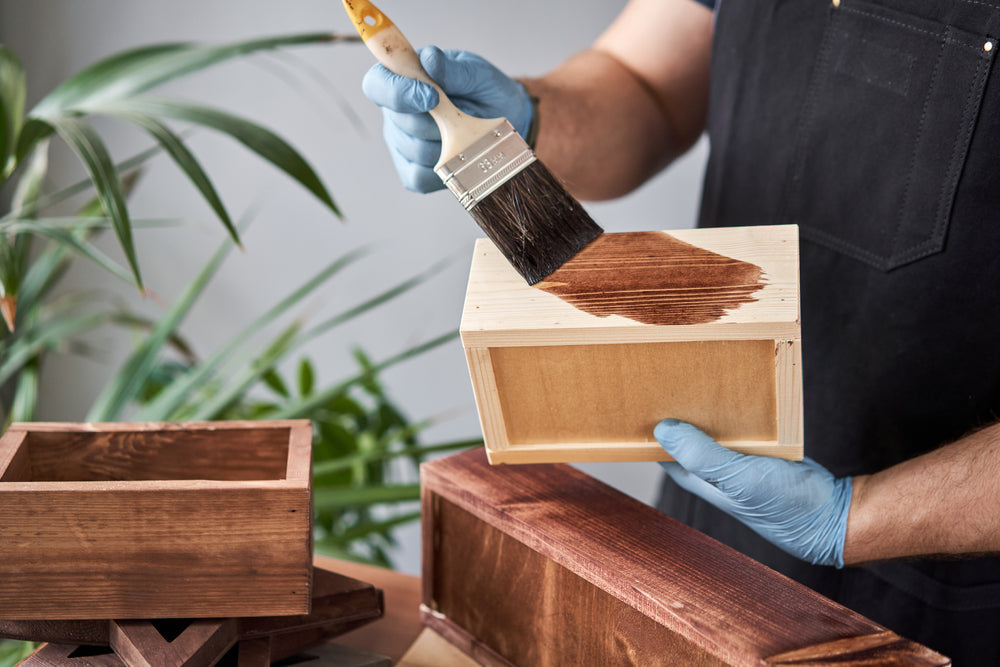
The Application Process: Best Practices for Ash Wood Finishes
The best way to apply stain to ash wood is to wipe it on with a lint-free cloth. Spread the product on, and then take it off again almost straight away. This way you will be able to color the ash wood without soaking it. You can experiment with leaving the stain on longer if you’re using gel or going for a textured look.
The moisture from the stain may penetrate the open pores of ash, causing the grain to swell and lift. Wait for the stain to dry thoroughly before sanding any lifted wood grain smooth. Drying times will be longer on colder days or if humidity levels are high.
Please wear gloves, a mask or respirator, and protective clothing when sanding ash wood or working with finishes, and follow the stain manufacturer’s instructions for best results.
Sustaining Your Ash Wood's Finish Over Time
As long as your finished ash creation is not exposed to extremes of heat, cold, or humidity, it should stay looking good for years. Sunlight will fade most wood stains; excessive moisture will cause color to leach and could harm the wood, too. Wipe wood furniture gently to maintain it, and avoid abrasive or chemical cleaners.
For heavily used items, say kitchen tables or chairs, you may need to add a coat of stain every 3-4 years to keep ash wood looking its best. Rub out any light scratching with a 220-grade foam sanding block and touch in the damaged areas, then finish with a top coat.
With care, ash wood can prove to be exceptionally durable, delivering many years of service.
Get in touch with us at North Castle Hardwoods if you need a special order of ash lumber for a custom project!


