Woodworking projects come in all shapes and sizes, but as any properly seasoned woodworker will tell you, to fail to plan is to plan to fail. However, planning for a project is straightforward, and success is guaranteed in just a few simple steps.
When you have a particular project in mind it’s good to understand what quantity of material you will need, and how much it will cost to make. Some projects will produce more waste than others or need specific tools. Sometimes, we must take a look at the time we have available.
Here’s our guide to seamlessly plan and budget your woodworking project.
Why is Planning for a Woodworking Project Important?
Careful planning is key to the successful outcome of any project. If you’re on a limited budget, you won’t want to overspend on unnecessary materials or equipment or run out of essential items.
When you are just starting out, it is sensible to allow plenty of time to do any woodworking project as you develop your skills and understanding of the relationship between tools and timber.
Spending time selecting and buying lumber, browsing stock, and imagining projects into life is fantastic fun, but it’s always sensible to make yourself a map, so you know where the project is headed.
Top Tip: Logistics
Do you have the working space to store and construct your project? A garage, barn, or other workshop is ideal. Logistics are a key factor. If you are building a big, or bulky item, make sure it can be delivered to where it is meant to go.
For example: If you are putting a bookcase together, can you get it up or downstairs? Will you need to assemble it in the room, or make it demountable for transport? Once constructed, will you need help to move a large or bulky bookcase?
Five Simple Steps for Planning a Woodworking Project
Let’s break things down.
1. Define Your Project
Ask yourself the question; What do I want to make? Define your project and begin drawing up or researching plans to make your idea a reality.
Grab a pencil, notebook, and a tape measure and set out what you want to achieve.
Project Function
Function; what is your project for? Sometimes function dictates form. There aren’t too many ways to store books for example, however, there are choices to be made. Do you want to display hardback books, or is your collection mainly paperback, or a mix of both?
The different sizes of book formats will inform the depth and height of a bookcase. Another consideration might be whether or not you want glazed doors to protect against dust, humidity, or children’s sticky fingers.
Project Form
Form; what do you want it to look like? Is it a celebration of the beauty of wood? A tabletop made from a fine-grained piece of lumber will need to be carefully selected for color and other nuances.
Different lumbers have properties that mark them out as better for one task or another. Hardwood is favored for fine furniture, whereas softwood is often better suited to more workday items.
Project Fashion
Fashion; in the old sense of the word, what processes and tools will you use to create your woodworking project? Are you limited to the tools currently in your workshop space or tool bag, or is this an opportunity to explore new ways of working with wood?
Woodturning is a fun way to spend time, from making candlesticks to creating fancy table legs, fruit bowls, or even walking sticks. There’s always something new to discover when you’re a woodworker.
Top Tip: Be Realistic About Your Skillset
No one starts a woodworking journey making perfect dovetail joints or creating furniture for a fancy chateau. That doesn’t mean you shouldn’t try or aspire to create something that has value and beauty.
However, one thing that will prevent you from finishing a project is if you find yourself over-reaching. It is always a good idea to begin small and extend your range as you become more experienced.
2. Determine What Materials You Will Need
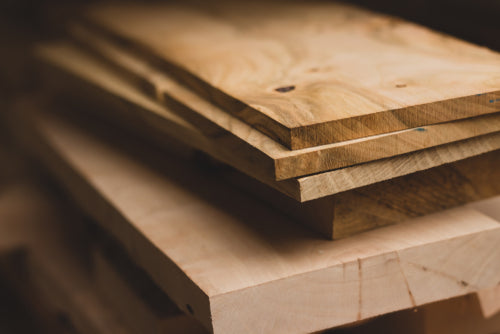
A large part of the fun is lumber selection, visiting the yard, and finding the perfect pieces of timber. Before you go it’s a good idea to spend a little time thinking about the materials required to complete the project.
Apart from the lumber, there are other things to consider. Does the project call for plyboard? Will you need glue? What about specialist fixings and hardware?
Lumber Storage
For most of us, our woodworking projects are something that we fit in between all the other things we are committed to, like work and family. In the meantime, we need to keep our tools and materials in good condition, and ready for work.
Safe, dry, lumber storage is all part of planning for success.
Top Tip: Timing is Everything
Starting a project is the easy part. You are full of enthusiasm, awake to the potential, and keen to get on and be creative. Finishing is much tougher.
The trickiest part of a project is the hard work in the middle, once everything is bought, paid for, delivered, and sorted out. Set time aside, make an appointment with yourself, get in the workshop, and move the project forward.
3. Calculate Measurements
The old saying ‘measure twice, cut once,’ always holds true. It goes against the grain for woodworkers not to be careful when it comes to planning how much timber to purchase. As a general rule of thumb, some folks believe you should make your calculations and then add 20%.
This advice is fine as long as you are confident in your measuring and workings out. There are easy ways to calculate board feet that can help a woodworker build confidence.
No one likes to run out of material toward the end of a job or find they have too much left over, but not enough for another project.
Is It on The List?
Make a list of all the lumber you need to complete the project, the lengths and widths. Wood is sold in standard sizes, so it helps when working out how much to buy. It may be possible to get two pieces from one length of timber.
Writing up a cutting list will help determine the exact needs of the project. For example, when building cabinets will they require backing panels?
Top Tip: Ask For Help
I don’t know everything; I’ll be the first to admit it. If I come up against a problem, and I can’t work out a solution, I’ll ask someone for advice. While the internet has plenty of answers, sometimes it’s a good idea to visit the lumberyard or local joinery shop.
There is a wealth of experience on your doorstep, and most of the folks I know are only too happy to show and tell!
4. Gather the Right Tools for the Job
When you’re working on a project there’s nothing more frustrating than having to improvise when you discover you don’t have the right tool for the job. Always check, and never assume that you have what you need.
That router bit you saw in the box yesterday, are you sure it was the right size? When was the last time you bought jigsaw blades? Go through your plan and make certain that you’re not missing anything.
Chances are that if you have to stop the job for want of a tool, no matter how small, picking up where you left off can be hard. Get what you need from the hardware store before you get going.
Fixtures and Fittings
Part of the pleasure of working on a woodwork project is sourcing the fittings, hinges, handles, drawer runners, and the like. Does your project need casters or wheels? Will it need brackets to secure it to a wall?
Top Tip: The Little Things
Check that you have enough of those small pilot drills required to prevent the wood splitting when using screws.
When cutting out for hinges, make sure your chisels are sharp enough to cut, and not crush the grain.
Don’t forget PPE, Personal Protective Equipment. Use a PP3 face mask when sanding, eye protection (especially over glasses), and cut-resistant gloves.
5. Execute the Plan
When a plan comes together, there’s no better feeling. Having everything you need at your fingertips will make a project fly.
The finishing touches are fantastic to look forward to, such as oiling, or varnishing a finished piece. Ultimately, this is the part that will likely take the least time, as most of the work will go into the preparation, the cutting, the assembly, and the sanding of your woodworking project.
Enjoy the satisfaction of completing a project, knowing that you prepared everything you could think of. There will likely be things missed, there will be workarounds and parts that could have gone better.
At the end of the day, you will have that experience under your tool belt, and have a better idea of how the next project will go.
Top Tip: Make Your Mark
Pencils get lost, and the lead gets broken all the time. Be sure to have a solid pencil and a means of sharpening it before you get going. Don’t use a pen, or marker as ink can leave a permanent stain.
For fine, cross-grain marking, some woodworkers like to use a craft knife. Just always remember which side of the line to cut and keep your hands behind the blade at all times.
Get in Touch
Wherever you are in your woodworking journey at North Castle we can help with the search and selection of a wide range of hardwood lumber. All our timber is hand-checked for quality by experienced woodworkers.
Talk to us today for help with planning your next woodworking project.


